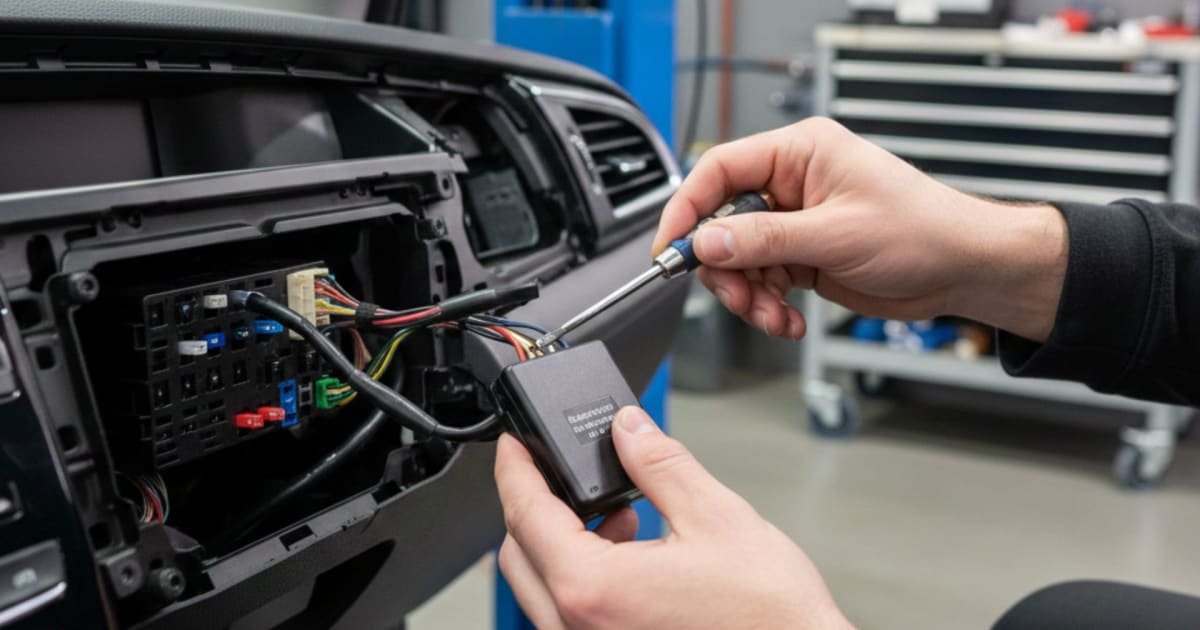
how to install a GPS tracker in a vehicle professionally
The moment you invest in a GPS tracker for car, a new motorbike, or an entire fleet of delivery trucks, you’re not just buying a piece of hardware—you are investing in peace of mind. But that peace of mind only becomes real when the installation is done right. A poorly installed device is a security risk, a potential maintenance nightmare, and frankly, a waste of your money. It’s the difference between a simple location ping and unlocking the deep data that leads to true operational efficiency, like Predictive Maintenance.
This isn't just about hiding a device; it’s about integrating a smart device into your vehicle’s ecosystem seamlessly and securely. Whether you are a private owner looking for an anti-theft GPS device or a logistics company deploying a multi-vehicle tracking system, learning how to install a GPS tracker in a vehicle professionally is the first, most crucial step.
Why Professional Installation Matters Beyond Just Tracking
Many people think a GPS tracker is a simple "plug-and-play" device, but the most powerful units—the ones that offer advanced features like engine diagnostics and driver behavior monitoring—require a secure, hardwired connection.
For the individual owner of a classic car, a secure, concealed installation is your primary defense against theft. You want the device to be nearly invisible and tamper-proof. For bulk users operating a fleet GPS tracking system, the stakes are even higher. You need consistent, reliable data across every asset. An installation that ensures the device is wired correctly to the vehicle’s power, ignition, and potentially the CAN bus system is vital. This professional approach is the foundation for leveraging modern, data-driven strategies like Predictive Maintenance.
The Essential Pre-Installation Checklist
Before you pick up a single tool to install a GPS tracker in a vehicle professionally, preparation is key.
1. Choose the Right Device for Your Vehicle
A basic GPS tracker for car provides location. A robust Truck GPS tracking system, however, needs to be rugged, weather-resistant, and capable of integrating with heavy-duty power systems. For bike GPS tracker installation, water resistance and size constraints are paramount. Always confirm the device voltage matches your vehicle’s electrical system (12V for most cars/bikes, 24V for many heavy-duty trucks).
2. Identify the Perfect Location
The best spots balance two competing needs: stealth and signal strength.
For Stealth (Anti-Theft): Deep inside the dashboard, near the fuse box, or even within non-essential body panels. The goal is to make discovery difficult and time-consuming.
For Signal: The device needs a clear, unobstructed "view" of the sky. While a small amount of plastic or glass won't interfere, placing it directly under a heavy metal frame or inside a sealed metal box is guaranteed to degrade the signal. Under the rear parcel shelf or near the windshield are often ideal compromise locations.
3. Gather Your Professional Tools
This is not a job for rusty pliers. You will need:
A digital multimeter to test circuits safely.
Wire strippers, crimpers, and a soldering iron (for the most secure, permanent connection).
Heat-shrink tubing and high-quality electrical tape for insulation.
Add-a-circuit fuse taps—these are non-negotiable for a professional, non-invasive connection to the vehicle’s fuse box.
Step-by-Step Guide: How to Install a GPS Tracker in a Vehicle Professionally
Step 1: Disconnect the Power
Safety First. Disconnect the negative battery terminal. Working with live wires is dangerous for you and could cause a short circuit in the vehicle’s complex electronics.
Step 2: Identify Power Sources with the Multimeter
A professional installation utilizes three wires: constant power, ignition power, and ground.
Constant Power (Red Wire): Stays live even when the ignition is off. Use the multimeter to find a fuse in the fuse box that shows 12V (or 24V) constantly. This is how the device tracks even when parked and maintains the battery.
Ignition Power (White or Yellow Wire): Only gets power when the ignition is turned on (accessory or run position). Find a fuse that is only live when the key is turned. This wire is critical for tracking engine runtime and movement.
Ground (Black Wire): Connect to a clean, unpainted metallic part of the vehicle chassis, usually with a ring terminal screwed securely. A poor ground connection is the number one cause of tracker malfunction.
Step 3: Making the Connections
This is where the difference between a DIY job and a professional corporate GPS tracking solutions installation is visible.
Using Add-a-Circuit: Instead of splicing into existing wires—which can void warranties and look messy—use an Add-a-Circuit fuse tap for the constant and ignition wires. This plugs directly into the fuse box, drawing power safely and cleanly.
Securing the Wires: Use crimp connectors or, ideally, solder the tracker wires to the fuse tap wires. Cover all exposed joints with heat-shrink tubing. This prevents shorts, protects against moisture, and keeps the connection secure against vehicle vibration.
Step 4: Secure the Device and Restore Power
Once the wiring is complete and the device is taped securely in its hidden location, reconnect the negative battery terminal.
Step 5: Testing and Calibration
Turn the ignition on. The device should power up. Open your Fleet GPS tracking system or personal tracking app and confirm:
Real-Time Location: The location is accurate.
Ignition Status: The system reports the ignition is "On." Turn the ignition off, and within a few seconds, it should report "Off."
Data Flow: The system should begin to transmit richer telematics data.
This confirmed, reliable data flow is the bridge to advanced applications like Predictive Maintenance.
Beyond Location: The Power of Predictive Maintenance
Why go through the effort of learning how to install a GPS tracker in a vehicle professionally? Because a correctly wired device does more than just show a dot on a map. It feeds crucial diagnostic data—engine hours, battery voltage, fault codes, and rapid acceleration events—directly into your tracking platform.
For Bulk GPS Tracking Service Users: Imagine your truck GPS tracking system alerting you to an abnormal engine temperature spike days before a catastrophic failure. That’s Predictive Maintenance. It transforms maintenance from a reactive, expensive surprise into a scheduled, cost-saving event, maximizing uptime for your entire operation.
For Individual Users: Your GPS tracker for car can monitor your battery health, alerting you to a failing car battery before you get stranded in a parking lot. It’s an investment that pays for itself in avoided repair costs and eliminated downtime.
When the installation is professional, the data is reliable. When the data is reliable, your personal GPS tracking becomes a powerful asset management tool.
FAQs on Professional GPS Tracker Installation
Q1: Can I install my GPS tracker myself and still be professional?
A: Yes, absolutely. "Professional" means using the right tools (like a multimeter and fuse taps), ensuring secure, soldered or crimped connections, and carefully concealing the device and wiring to prevent tampering or accidental dislodging. Always prioritize safety and connection security.
Q2: Will installing a GPS tracker void my vehicle’s warranty?
A: Generally, no, provided you do not splice or cut into the vehicle’s factory wiring harness. Using Add-a-Circuit fuse taps and making a clean connection to a chassis ground is considered a non-invasive, reversible installation that should not affect your warranty.
Q3: What is the most critical mistake to avoid in a professional installation?
A: The most critical mistake is relying on an insecure ground connection or splicing wires without proper insulation. An insecure ground leads to intermittent data, while poor insulation can cause short circuits. Always use heat-shrink tubing and connect the ground to a clean, metal part of the vehicle’s frame.
Q4: How does a professional installation enable Predictive Maintenance?
A: A professional installation, especially for fleet vehicles, ensures the tracker is correctly wired to the ignition and often to the vehicle's diagnostic port (via a separate interface). This secure connection allows the device to capture rich telematics data—not just location—such as engine fault codes, battery voltage, and fuel consumption, which are the raw inputs for Predictive Maintenance analytics.
Conclusion and Next Steps
Learning how to install a GPS tracker in a vehicle professionally is about moving past simple "I know where my car is" tracking and stepping into the world of smart logistics and vehicle asset management. From the single owner protecting their investment with an anti-theft GPS device to the logistics companies optimizing routes and slashing maintenance costs, the quality of the installation determines the quality of your data—and the effectiveness of your entire solution, especially for advanced features like Predictive Maintenance.
Don't settle for a rushed, exposed, or unreliable installation. Choose the professional route to ensure your truck GPS tracking or personal car security system operates flawlessly, 24/7.
Ready to secure your vehicles and transform raw data into a powerful operational advantage? Contact us today for recommendations on the best bulk GPS tracking service or individual installation guide tailored to your specific vehicle type and security needs. Share this guide with a fleet manager or car enthusiast who needs to know the difference a professional install makes!


Comments
Post a Comment